- EU JAACO 2025-02-13 21:13
-
- 0
- 755
- 3
🐲
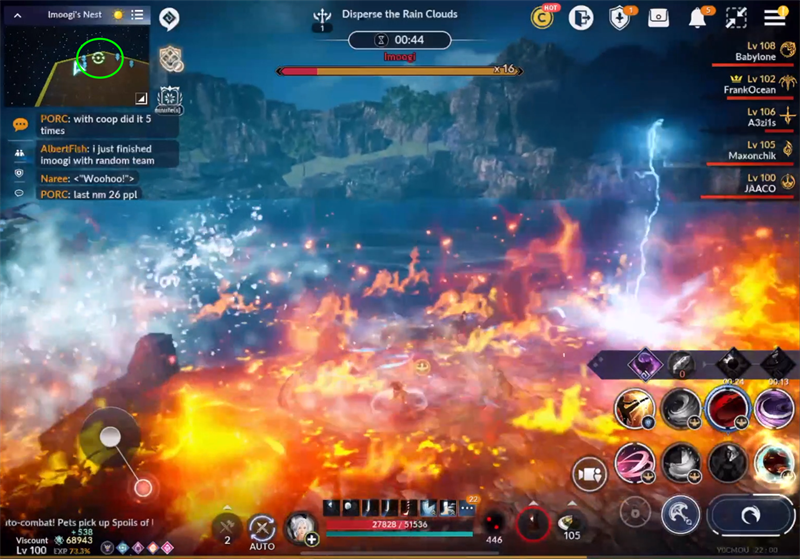
Warning!
To survive Imoogi, avoid
the blue lightning zone
(bordered circles)
and
the red fire zone
(marked area)
Watch out for protection zones,
they become trapS! (lightning)
who will protect them now?

You'd be surprised, dear killers.
I was thinking how to start and I don't have to,
I looked up what is written about Korean dragons on the internet...
so... let's take a look at the colorful mythology of the Korean peninsula for a moment.
이무기
this is the Korean word for dragon
Imugi

Imoogi
will be his angry cousin

In any case, it should be mainly about kind beings connected with water and earth,
who can do various tricks with water.
It is further stated that they are sentient talking beings,
capable of understanding complex emotions such as devotion, kindness and gratitude.
And what about you, dear killers.
Will you make an effort to reason with the dragon Imoogi?

Or will you once again resort to your traditional primitive brutality...

Pearl Abyss Corp. already knows the answer,
and you will soon know it…

Yes, yes, you guessed it right, once again your next goal will be mindless killing,
this time of beautiful mythical Korean dragons.

1.
With a gang of five assassins, this time you will go to the seashore,

2.
Where, on the site of a remarkable hexagonal pier,
you must force six small outer beacons
to emit the same glow (Aura) as the larger central beacon.
(There is no switch)

Moon
Earth
Sun
(There will probably be three options)

The thing is that those lighthouses protect Yeouiju,
the star source of dragon power, which is located in the central beacon.

3.
Once you manage, with a code (Moon or Earth or Sun),
to break the protection of the central beacon,
Yeouiju will explode with such force that the Imoogi, who was flying around furiously,
will lose consciousness and fall on the pier right at your feet.
|
|
|


4.
Now you have the first opportunity to use your heroism and incredible courage.
and remove some of the life force from the stunned the Imoogi.

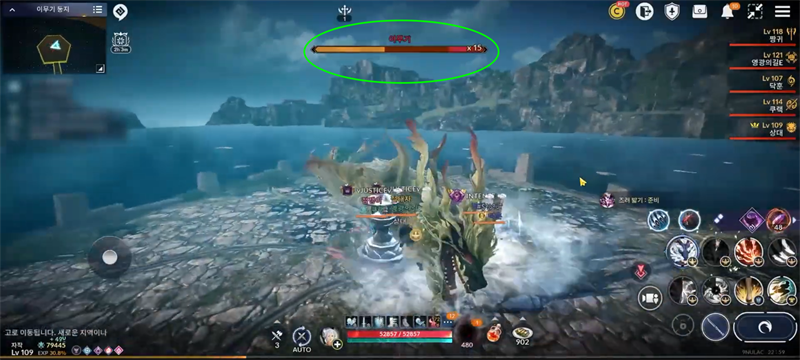
5.
The Imoogi will wake up after his life force drops below *Lv 15,
*(the amount of damage depends on the strength of your team)
6.
…taking you to the next phase of the fight,
where, under Imoogi's constant attack, you will have to
to destroy the fragments of Yeouiju's dragon power,
which glow with a different symbolism (Aura) than the central beacon.

7.
After you manage to destroy the other sources of dragon power,
the Imoogi will attack you from the outskirts of the pier.
This will give you more opportunities to take away more of Imoogi's life force.
8.
Imoogi attacks, you attack,
basically avoid red signalled areas
and always use the protection zones that are signalled by white light.
the red signaled areas |
the protective zones are visible in advance on the minimap |
|
|
|


9.
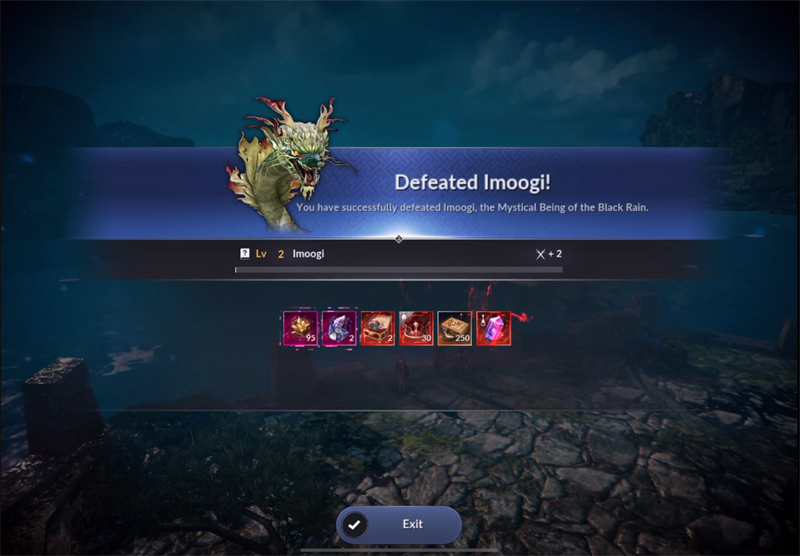
Finally, the Imoogi will lose all of its life force and fall defeated on the pier.
(to later be revived for more battles)

10.
And you, murderous heroes and traditional environmental disasters,
you will receive a reward from Pearl Abyss Corp,
for your contribution to the total subversion of Korean mythology.
When you virtually succeeded in removing the Korean peninsula's dragon protector, Imoogi.

(or was that another story?)
THE END
JAACO
P.S. thank you to our agents and testers from the Asian part of BDM
UPDATE 2025-02-26
I thought it would be easier with the Imoogi dragon.
A lot of players are confused and don't know what to do.
| Warning! Lightning strikes the blue marked areas, which will take a lot of HP away from you |
|
|
|
|
|
|
Imoogi can change the aura of the lighthouse with his attack, you must repair it so that it shines the same as the central lighthouse |
 |
|
If you fail to set the aura of the outer beacons to the same as the central beacon... the central beacon will not explode |
The central beacon will absorb energy from the outer beacons, the beacons will lose their auras and you have lost the opportunity to take away 5 Lv of Imoogi's life energy... you can continue, but it is a big loss, it is better to restart the fight (you will save resources) |
|
|
|
| If you manage to set all the beacon auras to match the aura of the central beacon... |
The central beacon will absorb energy from the outer beacons and soon explode… |
|
|
|
|
The central beacon will cause an explosion of energy |
Imoogi will lose consciousness for a moment and you have a chance to drain a lot of his life energy. |
|
|
|
| if you are strong and fast, you will take away more life energy from Imoogi in this phase | |
 |
|
|
Always watch out for blue zones, which will be hit by lightning soon! |
|
|
|
|
|
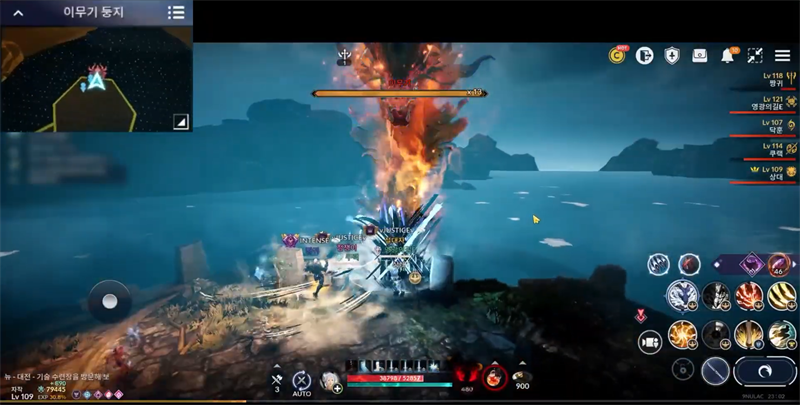
Floating sources of dragon energy with different auras will appear, you must destroy them within a limited time of 2 minutes. |
At the same time, the task with the red lightning and tornado is activated. See "Some explanations" below. |
|
|
|
|
The Imoogi is angry and attacks you. The randomly selected team member who will have the red crosshair should complete the quest with the red lightning and tornadoes. You will lose another opportunity to easily take away about 5 Lv of life energy from him. |
|
|
|
|
|
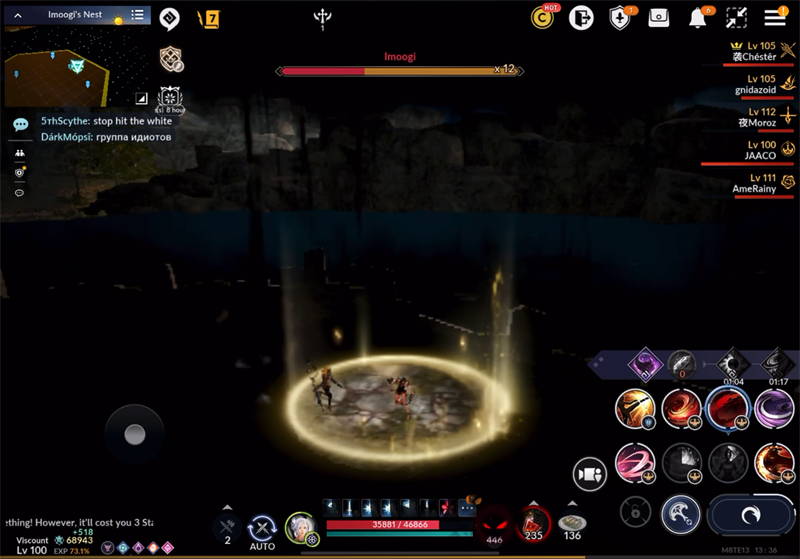
Pay close attention to the protection zones… |
…sometimes they become perfect traps !! |
|
|
|
|
The lightning that hit the protective zone took away about 15% of my HP |
In the last phase you have 5 minutes to defeat Inoogi, who you have to attack, running around will not win anything (see Minimap) |
|
|
|
|
|
Always be very careful of lightning - its blue signal |
|
|
|
|
If you're left alone, you have no chance of winning, your time is running out. And even though Imoogi can't heal, your attacks won't hurt him much. |
Just like the blue lightning zones, the red fire zones must be avoided. There was enough time, I could have been more careful. This is my best for now. |
|
|
|
|
|
|


UPDATE 2025-02-27
With the movie link in the introduction, here are a few more little things
that could save your life... and maybe something more (little things)
|
Similar to Co-op Rush -> White Branch Tree Forest, you have one life to spare here too. |
Save your precious HP materials. The initial phase (x2 Aura) can be successfully completed with Fornetta's Blessed Potion (+700 HP), use Concentrated HP Potion (+1500 HP) from about halfway through the fight (> 4 min) |
|
|
 |
| In the initial (x2 Aura) phases, be very fast and help each other. The goals are clear, so no wandering around and doing nothing. |
I was lucky to have a great team, the video in the introduction clearly proves it. The cooperation was truly perfect. Thank you friends. |
|
|
|
| I was robbed of the rest of my life force (it wasn't much) by some dark energy. Safe zones are used to protect against the effects of dark energy. (see the marker on the Minimap) | Nothing ends with one death, you can be resurrected. The life bar will drop to zero. And you can join the fight in full health and strength. |
|
|
|
|
A small warning: the AUTO function is not active when you return. I didn't even notice it and finished the fight on the manual. |
|
|
If you did everything correctly and on time with the floating auras in the second phase (you must not destroy the floating auras that have the same symbolism as the central lighthouse), the weakened Imoogi will fall onto the pier... and you already know what to do...
See "Some explanations" below. |
|
|
|
|
|
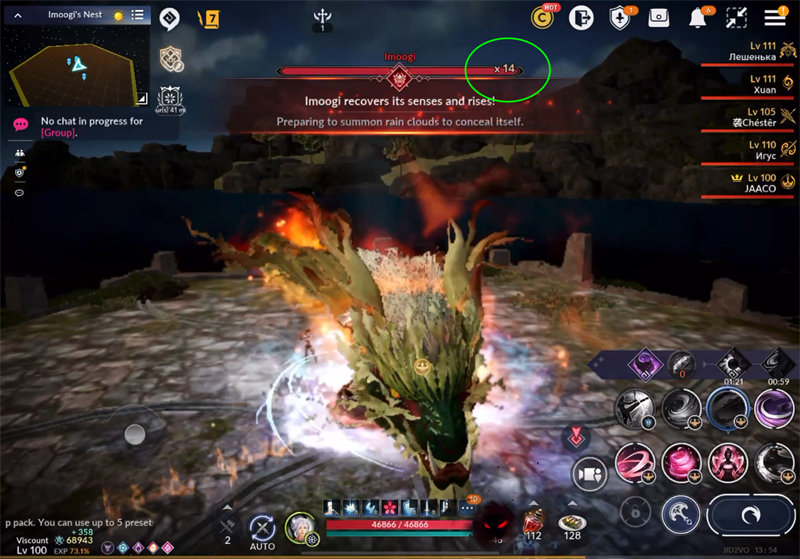
The Imoogi returns to the sea and is very angry with you. |
Imoogi is angry with you and it's starting to get really hot... |
|
|
|
|
From now on, it's just a matter of fighting and protecting yourself from the dark energy. |
|
|
|
|
|
The Imoogi dragon is a bit of a wizard, he can conjure up doubles. Don't get too confused, just wait until the Imoogi sign appears on the edge of the pier, then do what you have to do... |
|
|
|
|
|
For your immense efforts and wisdom, you will be duly rewarded by our dear Pearl Abyss Corp. |
|
 |
|


Good Luck
JAACO
Some clarifications:
I.
Dark Energy or a Giant Rain Cloud (as the creators state in their description)
I think it could be both, clouds are charged with energy, dark clouds… :) …dark energy.
In any case, the effects of both are very unpleasant and even deadly,
effective protection against their negative effects are safe zones.
II.
Safe zones or Perfect Traps
(protect you from the negative effects of dark energy from large dark clouds)
Bonus: According to the creators, safe zones should add some HP.
Perfect Traps: If a lightning (blue circle) or fire (red circle) signal appears in the protection zone,
run away, but never into the dark energy! ...its negative effect is greater (deadly).
III.
Imoogi's second blackout
I thought that Imoogi's second loss of consciousness was related to just
floating fragments of energy that had different auras (moon or sun or earth)
Another element, according to the creators, is the rain cloud that Imoogi hid in.
IV.
The rain cloud in which Imoogi hid.
After destroying the floating fragments of dragon energy that emit various auras,
one team member is equipped with a red target that is constantly hit by red lightning.
His task is to drive the Imogi out of the clouds in which he has hidden.
The location of the clouds is marked on the minimap.
|
|
|
|
|
 |
|
To make Imoogi lose consciousness, three (x3) tornadoes need to be triggered. |
|
|
|
|
|
|
|


Once the team member with the red target reaches the mark above which Imoogi is hidden in the clouds,
a red bolt of lightning strikes.
The red bolt hits the clouds and creates
a tornado that drains some of Imogi's energy from the central beacon.
After three tornadoes, Imogi is so weakened that he loses consciousness and falls onto the pier. (second time)

- Europe
- JAACO